
Create Your Own Abstract Wall Art
Are your blank walls in need of a little personality? There’s no better way to show off your creative side and refresh your space than handmade wall art. For an elegant final touch, add a DIY wood frame to highlight your masterpiece. This simple project is a great way for you and your kiddos to unleash your inner artist.
Are your blank walls in need of a little personality? There’s no better way to show off your creative side and refresh your space than handmade wall art. For an elegant final touch, add a DIY wood frame to highlight your masterpiece.
With Loctite® Power Grab® Ultimate Crystal Clear, constructing your frame is a breeze. Simply size the wood, glue it securely together (without even using clamps!) and hang your finished art on the wall. This simple project is a great way to spend an afternoon with your kids, or even a date night in with your partner.
Our friend Bryan (@beginninginthemiddle), supervised by his wife Catherine, turned this project into a daddy-daughter activity. Rather than another unapproved mural drawn on their household walls, Bianca and Bryan teamed up to create a beautiful piece of framed art that now hangs proudly in Bianca’s room!
What You’ll Need:
- Scrap wood (enough to border your canvas on all four sides)
- Loctite® Power Grab® Ultimate Crystal Clear
- Canvas (any size you prefer)
- Acrylic paints
- Paintbrushes
- Tarp or newspaper to prevent mess
- Picture frame hanging kit
Directions

1. CHOOSE YOUR COLOR PALETTE
The first step is to select the colors you will use to create your painting. An abstract art piece is up to interpretation, but if you’re stuck on colors to use, we suggest selecting the room in which the painting will hang, then basing colors off the tones in that room.
Of course, you’re welcome to channel a different style of art for your canvas. If you would prefer to paint a naturescape, portrait or other subject, go for it! This project is all about expressing your personality. But if little ones are involved, we do recommend going “abstract,” and letting their paintbrush run free.
Bianca’s room is warm and inviting, featuring robust wooden furniture and an exposed brick wall. Pale pastels in pink, blue, white and yellow with a touch of dark blue-black created the perfect color palette for Bryan and Bianca’s artwork.
2. USE YOUR BEST PAINTING TECHNIQUE
It’s time to paint! Grab your paints and brushes and dive into your art. Bring your vision to life!
Bryan and Bianca went into their painting armed with a color palette, paint brushes, paint knives and no particular plan. Together, they went with the flow and let Bianca spend some time channeling her inner artist.
3. CUT WOOD FOR THE FRAME
While your masterpiece is drying, cut the wood for your frame. Measure the sides of your canvas and cut four pieces of wood accordingly. Make sure to factor joinery into your cuts.
With Bianca’s tasks for the project complete, Bryan used oak wood leftover from a previous project to construct the pieces of his frame.
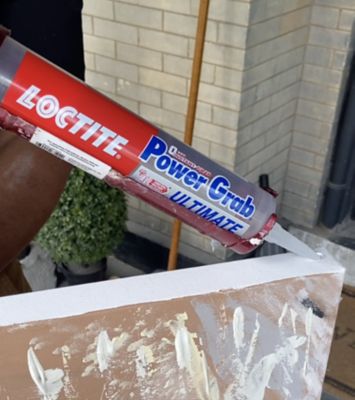
4. ATTACH THE FRAME WITH LOCTITE ADHESIVE
Apply Loctite® Power Grab® Ultimate Crystal Clear to one side of the canvas and attach your first frame piece. To attach the second frame piece, apply Loctite® Power Grab® to the next side of the canvas and the side of the first frame piece. Press together tightly to secure.
You won’t need to use clamps to make sure your frame stays together! Loctite® Power Grab® is super strong and stays bonded. It’s also crystal clear with an applicator tube that prevents mess. Bryan used Loctite® Power Grab® to piece together all four parts of his frame onto the canvas.
5. SAND AND FINISH WOOD
Once the frame’s glue has dried, sand it down and apply paint for another pop of color or a polyurethane finish for a more natural look.
A more natural frame nicely complemented Bianca’s color palette. Bryan sanded the frame down, then applied poly to finish.
6. HANG YOUR WORK OF ART!
Once your finish has dried, it’s time to hang your work of art! Grab your picture hanging kit and mount your framed canvas on a wall of your choosing.
Bryan and Bianca’s masterpiece fit perfectly in Bianca’s room. Now she gets to enjoy it all the time and remember the special time she spent creating it with her dad!


