
Whether you are working with fiberglass, carpentry, cements, metals, or plastics, epoxies are the perfect choice when you need an extra strong bond. After you learn how to choose the right epoxy resin for the material you’re working with, you can confidently move forward with your project. This guide will help you understand how to use epoxy correctly, so you can achieve the best results for your project.
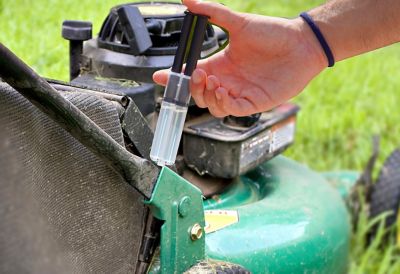
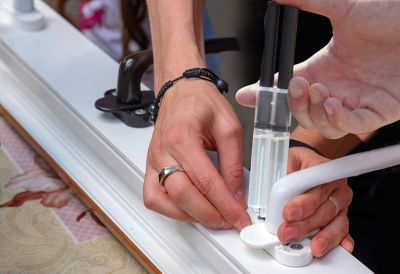
Epoxies often come in two-chamber syringes.
What is epoxy glue, and what are its uses?
An epoxy is a two-part adhesive that forms when you mix epoxy resin and hardener. The two substances are stored in different containers and are only mixed together when you’re ready for gluing – which you can do using a double syringe, for example. You should keep the mixing ratio 1:1, otherwise the resin will not cross link.
After you mix both components, the pot life begins. That is the period during which the parts to be bonded can still be moved and changed. The pot life can range from a few minutes to a couple of hours depending on the glue you use. After the pot life, the glue needs several hours to reach maximum strength.
Epoxy is highly versatile and extremely strong, making it perfect for DIY projects. It is also a gap-filler, which makes it perfect for reconstructions. On top of that, epoxy can be sanded, drilled and painted. This gives it a much wider range of uses than standard glue.
Instructions for epoxies
- Roughen the surfaces you want to bond with sandpaper or by carefully draw-filing the areas. Remove dust, grease, and dirt from the surfaces.
- Cut the end tips of the application syringe. Turn the syringe up and depress the syringe slightly, pushing the air bubbles to the top.
- On a disposable surface, push the double plunger to dispense equal parts of the resin and hardener. If your epoxy does not come with a tray, it would be a good idea to purchase one. If you don’t have the time to purchase a tray, use a disposable plate or a well-cleaned yoghurt container.
- Retract the plunger slightly, wipe the application tip clean, and replace the cap.
- Quickly mix the resin and hardener until completely blended (1-2 minutes).
- Add a small amount of the glue to the items you are bonding, carefully assemble them, and press them together firmly. Set and cure times vary for different products, so check the packaging or manufacturer’s instructions for details.
- Remove excess epoxy
Want to see the full list of Loctite epoxies? The top-of-the-line formulas use advanced technologies to provide epoxy glues for a variety of tasks. Whether you are dealing with wood, metal, cement, plastics, or marine equipment, epoxy is a good solution for your project.
Epoxy glue for metal
Using an epoxy for gluing metal is a handy alternative to welding, soldering, or bolting. A very strong epoxy for metal is Loctite Epoxy Metal/Concrete. This product is ideal for repairing household appliances, machinery, and pipes and is also highly effective in securing bolts and screws into metal. Loctite Epoxy Weld Bonding Compound is another metal epoxy you can use for your project. Both products cure to a metallic gray color, can be sanded or drilled, are water resistant, and set in about 10 minutes with full cure in under 24 hours. This epoxy won’t conduct electricity, making it ideal for sealing electric components.
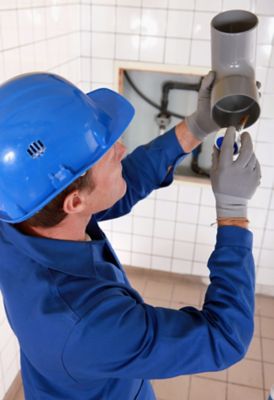
Use epoxy to glue pipes.
Epoxy glue for woodworking
If your wooden mantel is broken, you will need a good wood epoxy like Loctite Epoxy Gel. This gel is well suited for vertical jobs because it has high viscosity and won’t drip while setting. The formula sets in 6 minutes and can be easily tinted to match the color of the surface. It won’t shrink and is water resistant, making it perfect for outdoor use.
Another epoxy that is up for the challenge is Loctite Epoxy Instant Mix 5 Minute.
This all-purpose product has a static nozzle on its applicator that automatically mixes the resin and hardener. That saves you the trouble of having to mix the two, which makes your repairs quicker and easier.
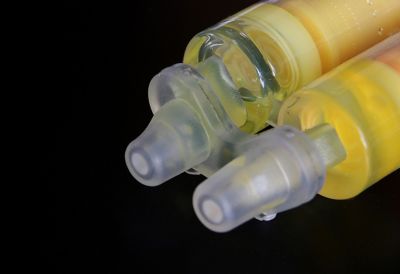
If you don’t want a mess, that’s no problem. Let static nozzles do the work for you.
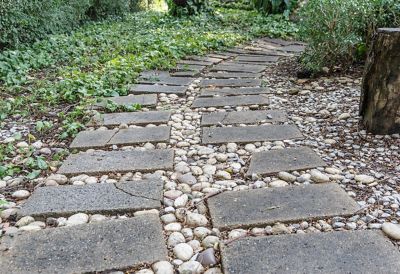
Epoxy glue for cement
If you have cracks in your garden step stones, you can easily fix them with the right epoxy. When choosing your epoxy, keep the intricacy and special requirements of your project in mind. For example, if you need a considerable amount of time to position the pieces of your project after applying your epoxy, you will want to choose an epoxy with a longer pot time. Loctite Epoxy Extra Time has a pot time of 60 minutes, which allows you to take your time assembling broken pieces of stone and concrete until your arrangement looks just the way you want. The highly impact-resistant formula also accommodates weight bearing and drilling.
Sometimes, you will need an adhesive for repairing, filling, and rebuilding all kinds of concrete surfaces. Loctite Metal/Concrete is a good candidate if you need to bond concrete. In addition to being water- and impact-resistant, this epoxy cures to a metallic gray color, which means it doesn’t need tinting in many cases.
Have your tiles cracked? No worries! You can easily repair your own tropical paradise.
Epoxy glue for plastic
From lawn chairs to car parts, plastics come in all shapes and sizes. With all the plastic products found in most households, it’s no surprise that some of them occasionally need repairing. It is a good idea to keep an epoxy that is specially formulated to bond and repair plastic surfaces on hand.
Burst a PVC pipe under your sink?! A convenient plumbers epoxy putty to have on hand is Loctite Repair Putty All-Purpose. The putty is moldable, can be bonded to damp surfaces, and cures under water. It can be used for surfaces besides plastics, such as wood, brick, ceramics, metal, and concrete.
Here’s a tip: You can speed up the cure time for epoxy adhesives by applying heat.
Epoxy can be used for both metal and plastic.
Marine epoxies
If your boat has sprung a leak, reach for Loctite Epoxy Marine to keep afloat. This marine grade epoxy, which is based on advanced technology, allows for underwater application and curing. It’s incredibly strong and very versatile, making it the perfect tool for surfaces that are constantly submerged in water. This marine epoxy resin can be used on PVC, numerous metals, ceramic, fiberglass, concrete, glass, wood, and certain plastics.

Has your boat sprung a leak? No problem, you can easily patch it with an epoxy.
How to remove epoxy
Epoxy adhesive is designed to last, so you will want to avoid getting it on your surroundings if possible. If you do end up with a mess, you’re not stuck with it for life. Here are some tips on how to remove epoxy.
- Removing cured epoxy: If your epoxy has dried and hardened, then you’ll have to use a rather aggressive method. Paint thinner, denatured alcohol, or adhesive remover will help soften the epoxy. Just dip a cloth in the solvent and rub at the epoxy you want to remove. Avoid skin contact and work in a ventilated area.
- Removing uncured epoxy: Uncured epoxy is softer, and therefore easier to remove than cured epoxy. Simple acetone or isopropyl alcohol will do the trick. Just apply the chemical to a cloth and rub the area until the glue yields.
- Removing epoxy from skin: If you get epoxy on your skin, you will want to remove it as quickly as possible. For a more natural approach, try using vinegar. Simply saturate a cotton ball and rub the area until it softens. You can also try nail polish remover with acetone.


