Every picture tells a story

How to glue pictures to wood: Permanent and temporary solutions

Whether it’s indoor, outdoor, temporary or permanent: we’ve got all the answers for how to glue pictures on wood.

What to consider before gluing photos on wood

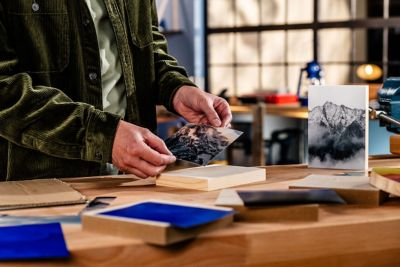
Gluing photos on wood, cardboard, or cork is a great way to showcase memories. If you find a piece of wood that would make a nice background, you’ll need to find the right adhesive. Here are some points to consider before reaching for just any super glue. 

  • Are the pictures replaceable? If you want to display old pictures, make sure you have a digital copy first.
  • Where will the pictures hang? Will they be inside or outside? Is the area humid or dry? Some adhesives are sensitive to ambient temperatures, so choose an adhesive that stands up to the elements. If you’re hanging pictures outside, laminate them for protection.  
  • Some glues have the tendency to curl corners and bleed through paper. Choose an adhesive that won’t damage the material you’re working with. 
Make sure the size of the photo matches exactly that of the wooden surface

How to glue pictures to wood permanently

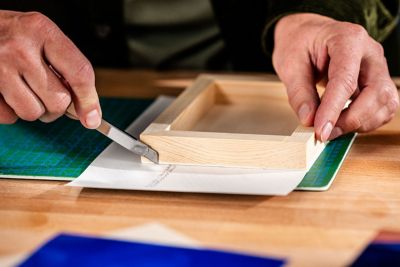
A photo-friendly permanent adhesive that adheres to wood is Loctite Spray Adhesive Multi-Purpose. This spray adhesive dries clear, won’t bleed through or cause wrinkling and curling on pictures.

Here’s how to glue pictures on wood with this handy spray adhesive. 

  1. Work in a well-ventilated area and protect the surrounding area from the spray. 
  2. Arrange the photos, so you know where they’re placed once sprayed.
  3. Turn the spray tip to the black dot to open the can.
  4. Shake the can 10-12 times to prep the adhesive.
  5. Hold the can vertically and spray across the picture surface in a continuous motion. While spraying, maintain 8-10 inches (20-25cm) distance from the surface.
  6. After applying a light even coat to one surface, place the picture on the wood and press together. Reposition quickly, if necessary, by peeling the photo away from the corner. The thicker the coat, the stronger the bond and shorter the reposition time.   
  7. Clean the applicator tip by flipping the can upside down and spray for approximately 2 seconds. Clean the spray tip with mineral spirits or turpentine.

Caution: Before using a solvent-based adhesive for this application, try it on a small, less visible part of the photo. Depending on the paper used, the solvent may penetrate the image and damage it.

Gluing photos to wood: The great outdoors 

If you need a heavy duty adhesive that’s suitable for outdoor use, we recommend Loctite Power Grab Mounting Tape. This roll of water-resistant double-sided tape has instant grab power that’s also resistant to UV damage and aging. It’s ideal for long-term hanging of a variety of materials including pictures, mailboxes, hooks and more. We recommend laminating or framing pictures before displaying them outdoors.

Spray Adhesives and Mounting Putty are great for gluing pictures to wood and other surfaces

How to temporarily glue pictures to wood

For a more flexible approach for gluing photos on wood, Loctite Fun-Tak Mounting Putty is the way to go! This indoor mounting putty is perfect for a variety of crafts and materials. A quick rundown of this versatile putty’s features: 

  • non-toxic
  • re-usable – minimizes waste
  • won’t damage walls
  • removable – great for temporary hanging
  • long lasting – won’t dry out

Here’s how simple it is to use this product. 

  1. Tear off a small corner of putty. 
  2. Knead the putty into a ball.
  3. Press the putty into the back of the picture. If desired, place in all four corners of the picture. 
  4. Press the picture onto the wood.   

To remove, gently peel away the picture from the wood. If any putty remains, simply roll more putty over the remaining pieces until it comes off.