A quick touch of class

How to install backsplashes like a pro

Knowing how to install backsplash can transform your kitchen. A well-designed backsplash can give your kitchen a snazzy decorative flair as well as make messes easy to clean. Our step-by-step guide will show you how to install and grout mosaic tile, and other backsplash styles whether it’s ceramic, stone, or other materials, to give your kitchen a fresh new look.

Knowing how to tile a backsplash will help you make your kitchen shine.

How to do a backsplash: What’s right for your kitchen?

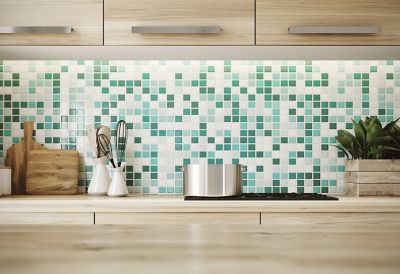
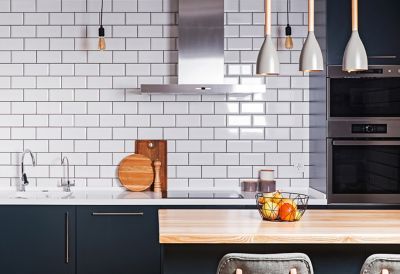
“Backsplash” is a term used for a panel or a vertical extension of a counter that protects the wall against splashes. As well as making clean-ups easy, a well-designed backsplash can also give your kitchen a unique decorative flair.

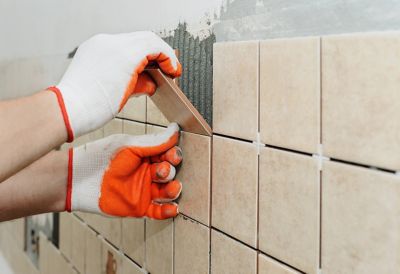
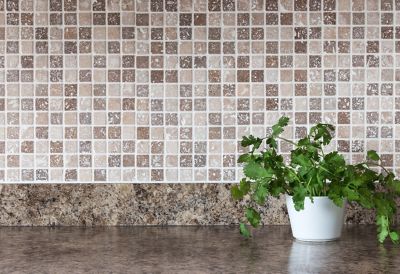
Before learning how to tile a backsplash, it’s important to learn about the different types. There are many types of tile backsplash, including mosaics on mesh backing and peel-and-stick tile.

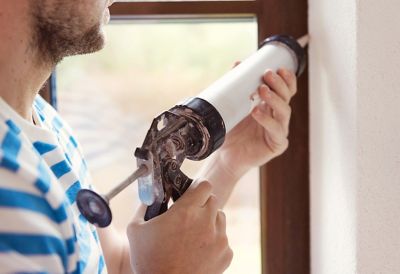
Because a backsplash is a prominent feature, it needs to be installed correctly and precisely. For easy repairs and a lasting hold, look for tiles that can be installed over drywall with the appropriate wall tile adhesive/thinset. Speaking of adhesives, you need to choose your adhesive depending on the type of tile you’re working with. Make sure to check the manufacturer’s instructions to make sure the glue is compatible with the materials you are using. For example, ceramic tiles require mastic, while stone tiles need a white thinset mortar.

Installing a backsplash adds style to kitchen interiors, protects walls, and makes cleaning easier.

How to install a tile backsplash

Follow these basic instructions on how to install a tile backsplash in your kitchen.

  1. Clear the area. Remove any objects, outlets, or appliances that may obstruct the area where you want to install the backsplash. Clean the walls of any dirt or particles. Sand or scrape away residue, if necessary, to create a flat surface.
  2. Align the tiles. Use a level to lay out the tile arrangement, marking lines and aligning them horizontally with the countertop.
  3. Apply adhesive. Apply the adhesive to the back of the tiles and place them on the wall, working from the center out and taking care to keep the tile level. Use grout spacers to keep the tiles apart.
  4. Cleaning and drying. Wipe away any excess adhesive with a damp cloth. The adhesive should be dry in 12 hours with full cure in 14 days, depending on the temperature and humidity, but always consult your product information to be sure.
Follow our simple steps and learn how to tile a kitchen backsplash.

How to grout a backsplash

Grouting is the process of filling in spaces between tiles. Most types of grout come in powder form, but premixed containers are also available. Whatever option you choose, be sure to consult the manufacturer’s instructions on how to install the grout. Here’s the basics on how to grout a tile backsplash.

  1. Get ready. Along with the grout mixture, you’ll need a putty knife, a grout sealer, a grout float, and caulk, as well as a plastic sheet, masking/painter’s tape, a sponge, and soft cloths with warm water. Use the plastic sheet to protect counters. Mix the grout according to the manufacturer’s instructions.
  2. Spread the grout. Using the grout float, apply the grout evenly into the spaces between tiles. Let it set for about ten minutes, then wipe away excess grout with the sponge and water. After a few hours, buff away any remaining film.
  3. Seal and caulk. After about 24 hours, seal the grout and caulk the outside edges, taking care to create neat lines where it meets the counter. For all your indoor caulking work, we recommend Loctite Polyseamseal All Purpose Adhesive Caulk for long-lasting, flexible seals.
Caulking is an important final step when you grout a backsplash.

How to install backsplash tile sheets for mosaics

Mosaic tile has become a popular kitchen backsplash style. Mosaic tiles typically come in sheets and can be applied using a method similar to the one used to install ceramic tiles. Here’s how to install backsplash tile sheets.

  1. Prepare for tiling. Determine the position of the tiles on the wall using a pencil and level. Cover countertops and adjacent surfaces with a plastic sheet and/or masking tape. Gather the tools mentioned in the section above, as well as a utility knife, a notched trowel, and, if applicable, a tile saw (see below).
  2. Apply the adhesive. Apply a layer of adhesive using a notched trowel after making sure your tiles and adhesive are compatible. Check the manufacturer’s instructions if in doubt.
  3. Position the tiles. Place the mosaic tile sheets in the proper position and press firmly. Use a utility knife to cut away the mesh on the sheets. To fit the sheets to your wall, you may have to cut them using a special tile saw. They are available for rent at tool centers.
  4. Drying and grouting. Allow the adhesive to dry overnight. Buff away any hazy residue with a damp cloth. Once the tiles are set, apply tile grout according to the instructions above.
Learn how to install backsplashes to give your kitchen a refined, new look.

How to do backsplash repairs

Your backsplash may get damaged – a tile might crack or fall off. This isn’t the end of the world: you can repair it in a couple of simple steps. We recommend using Loctite Power Grab Express All-Purpose Interior Construction Adhesive for repairing your backsplash. It’s a high-strength, gap-filling adhesive that dries quickly and cleanly for easy, professional installation. Here’s how to do backsplash repairs.

  1. Remove the damaged tile and residue. You will need to make room for a new tile and some adhesive underneath. Create a level surface and scrape away residue so the tile will stick and stay this time.
  2. Apply adhesive. Apply the adhesive to the back of the tile and place it on the wall. Watch this video to learn more about Loctite Power Grab Express All-Purpose Interior Construction Adhesive.
  3. Re-seal the gaps. After the adhesive has dried and cured, you can grout the gaps between the new tile and the old ones according to the instructions above. If you’re replacing a tile at the edge of your backsplash, use caulk where it meets the counter or kitchen furnishings. We recommend Loctite Polyseamseal All Purpose Adhesive Caulk for this job, as it creates a long-lasting and flexible seal.